
Summarize with
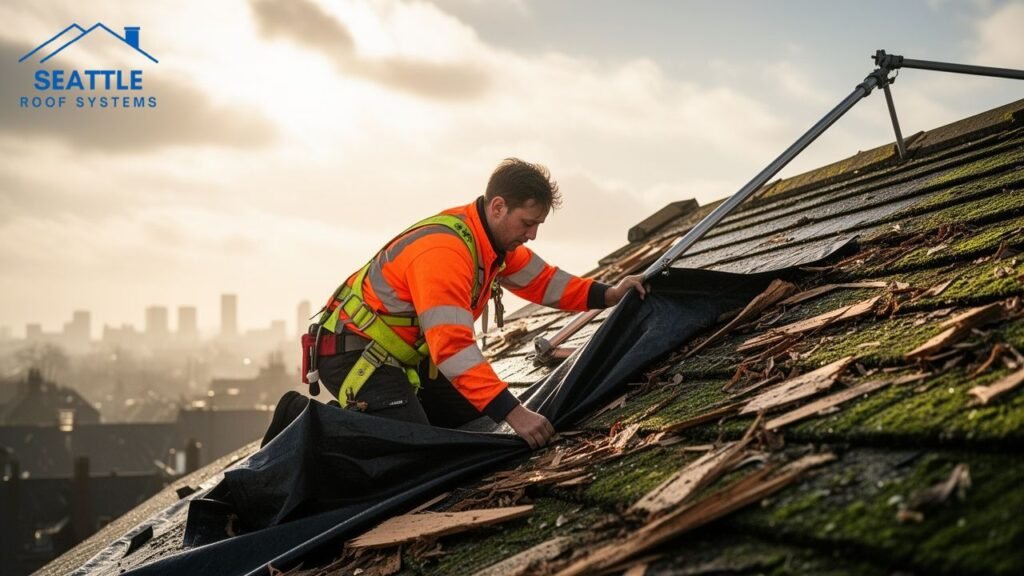
An injured roof wants a tarp within hours of a storm not days. Emergency roof tarping is a temporary waterproofing that involves sealing open decking with heavy duty poly sheet, wood battens and roofing nails until permanent repairs are made. If done correctly, it provides you a week or 2 of security. If it is not installed properly, it can rip out in the next storm and allow water to flood the area where you wanted to place it.
Seattle roofs take a specific kind of beating. It’s not the wind gusts that do the most damage here it’s the combination of wind-driven rain, moss buildup on north-facing slopes, and the region’s habit of stringing three or four storms together over a week with barely a dry afternoon between them. A tarp that would hold up fine in a drier climate can fail here simply because the roof underneath never gets a chance to dry out before the next system rolls through. That’s one reason the National Weather Service’s Seattle office tracks atmospheric river events separately from regular winter storms they produce sustained rainfall totals that overwhelm patched roofs faster than a single hard rain would.
Insurance timing matters here too. Most homeowner policies require “reasonable steps to prevent further damage” after a covered loss, and a poorly documented or delayed emergency roof tarping job is one of the more common reasons adjusters push back on claims. According to guidance published by the Insurance Information Institute, photography the damage before covering it and keeping proceeds for tarping supplies are both expected parts of the claims process is not voluntary extras.
This complete guide trips through when tarping is actually necessary, how to do emergency roof tarp installation safely, a full step-by-step process, and the mistakes that turn a two hour fix into a much bigger repair bill.
Choosing the Right Tarp: Weight and Coverage by Roof Situation
The material choice matters more than most householders expect. A light painter’s tarp from an equipment store aisle is built for drop cloths, not for remaining 40 mph gusts nailed to a roof deck. Roofing-grade poly tarps are rated by mil thickness, and the right width rely on how much of the roof is uncovered and how long the tarp needs to hold.
| Situation | Recommended Tarp Weight | Coverage Needed | Fastening Method |
|---|---|---|---|
| Small hole (limb strike, missing shingle patch) | 6-mil poly tarp | Damage area plus 4–6 ft extending past on all sides | Wood battens over hems, screwed into rafters |
| Wind-torn section (partial shingle loss) | 10-mil reinforced poly | Full slope from ridge to eave where torn | Battens along ridge and eaves, nailed every 12–18 inches |
| Large structural hole (fallen tree, storm collapse) | 12-mil or heavier reinforced poly | Damage area plus full extension to ridge and nearest rafter lines | Battens on all four sides plus mid-tarp bracing boards |
| Chimney or flashing failure | 6-mil poly, cut narrow | Chimney base extending 2 ft past flashing lines | Battens sealed with roofing cement at chimney edge |
Safety Guidelines Before You Climb Up
Wet roofs, especially anything with moss or algae growth, are far more dangerous than they look from the ground, which is exactly why safety comes before speed. A fall from a residential roof doesn’t need much height to cause a serious injury, and OSHA’s residential fall protection standards exist precisely because roofers underestimate how quickly footing goes from stable to gone on a wet surface.
Work with a partner, never alone. If the roof is steeper than a gentle walk-up slope, be sure to be on a harness attached to a permanent structural point and not be on the roof during active wind or lightning. If you can see any signs of sagging decking or hear any cracks from the structure below the hole, then it’s an unsafe place to walk and you should call a roofing contractor for an emergency evaluation rather.
Emergency Roof Tarp Installation | Step-by-Step Guide
Here’s the full sequence for how to tarp a roof after storm damage, from initial assessment through the final check.
Step 1: Photograph the Damage First
Walk around the perimeter of the house, taking good wide shots from at least 4 points before you ever get near to anything and then come close to the hole and to the lifted shingles or to the crushed decking itself and take close shots of those. Photograph the tree limb that is still attached to the tree if the damage has been caused by a tree limb. Insurance adjusters can tell how things look, but not always what happened. If you can safely get into the attic, take a close look and, using a flashlight, take a picture of any windows that are leaking light into the attic, any water stains on the roof framing, or any wet insulation already in place.
Step 2: Check the Weather Window
Get a short range forecast (not only the daily forecast), and examine the hourly precipitation probability and wind speed for the next four to six hours. Rain should not be a concern, as should wind gusts, which are around 20 mph or more, because the loose tarp itself can be blown off, and an unsecured person can be blown over long before it is. A break in the storminess can appear perfectly calm on the top of the roof while the decking is soaked from the previous hour of rain, Plywood can appear dry on the surface when it has been drenched by rain, and roofing boots that seem solid on dry shingles can slip out of place on wet OSB.
Step 3: Clear Debris From the Damaged Area
A tarp must sit flat against the roof deck to seal and anything that is left under it will have branches, granules and torn shingle pieces, loose nails that will create a gap that water will seep in. Use a hand saw or loppers to remove large debris, such as limbs of trees, but avoid trying to drag a whole branch off the roof at once as it can make you lose your balance on a steep surface. Use a push broom, sweeping from ridge to eave to get rid of shingle debris and granules.
Step 4: Measure the Damaged Section
Use a tape measure to record the length and width of the actual hole or exposed area, then add at least 4 feet of clearance on every side. This is not a rough guideline, it’s the minimum margin that keeps wind-driven rain from blowing sideways under the tarp’s edge during a sustained storm. If the damage sits anywhere near the ridge, extend the tarp fully over the ridge line and down the opposite slope by at least a foot or two, since water running down the undamaged side can still find its way behind a tarp that stops right at the peak. Measure down to the nearest full course of shingles below the damage as well, rather than stopping at an arbitrary point mid-course, because tucking the tarp’s lower edge under an intact shingle course lets water shed over the tarp instead of behind it.
Step 5: Cut 2×4 Boards Into Battens
Battens are what actually hold a tarp down through wind, not the nails themselves, so this step deserves real lumber, not scrap. Use pressure-treated or standard construction-grade 2x4s, cut into lengths that match each edge of the tarp with a few inches to spare on either end. For a small patch job you’ll need roughly four battens one per edge but for a large structural hole, plan on additional mid-span pieces that run perpendicular to the main battens, bracing the tarp across its middle so a gust can’t billow it up like a parachute. Cut these on the ground with a circular saw before climbing up, since running a saw on a sloped, possibly wet roof deck is a fall risk that isn’t worth the convenience.
Step 6: Roll the Tarp Out and Position It Over the Damage
Carry the tarp up folded rather than rolled if possible, since an unfolded tarp catches wind the moment it’s exposed, even on a calm-seeming day a sudden 10 mph gust can pull a fully open tarp out of your hands and off the roof entirely. Position it so the excess material extends roughly evenly past the damage on every side based on the measurements from step four, then unfold it slowly, working from the center outward while a second person holds the near edge down. Place the edge of the tarp that will be facing the wind (the leading edge) facing the direction of the last storm’s wind, as you can generally determine by the direction in which the shingles were lifted or which side of the trees lost the most branches.
Step 7: Fold the Tarp Edges Around the Battens
Take one side of the excess tarp material and fold it over the other side of the corresponding batten, ensuring that the board is snug enough to fit inside a pocket of folded material, not just a layer of one material on top of a layer of another. The difference between a wind-tossed tarp and a tarp that stands up in a windstorm is this wrapped-edge method the single layer of poly material that is nailed through is a stress point that almost immediately begins to rip away from the nail hole once the wind begins its work. As you work one edge at a time, make sure that the fold is consistent along the whole length of the batten, just like the material is being pulled on the whole length of the tarp; otherwise the fold may bunch up at one end while remaining loose at the other end.
Step 8: Nail the Battens to the Roof Deck Through the Rafters
Locate the rafters before nailing. You can usually find them by measuring in from a gable end at standard 16 or 24-inch spacing, or by looking for existing nail patterns from the original shingle installation, which are typically driven into rafter lines. Roofing nails driven only into thin plywood or OSB decking between rafters pull loose within days under repeated wind flex, because the decking itself has nothing solid backing it at that point. Use galvanized roofing nails at least 1.5 inches long, spaced every 12 to 18 inches along each wrapped batten edge, driving them at a slight angle into the rafter rather than straight down, which gives the fastener more resistance to being pulled straight back out by wind uplift.
Step 9: Work From the Top Down
Secure the ridge-side batten first, before touching the side or bottom edges, because this establishes the anchor point that everything else overlaps against much like starting a shingle course at the bottom of a roof and working upward, except in reverse for a tarp, which needs its upper edge locked down first so lower layers shed water over it rather than under it. Once the ridge batten is nailed, move to the two side edges, pulling the tarp taut as you go so it doesn’t develop slack pockets between the top and sides
Step 10: Seal Exposed Nail Heads and Seams With Roofing Cement
Each nail you have driven is a little hole in the tarp and although most of that hole will not be exposed to direct water, over time wind-driven water can make its way in if the nail heads are not properly sealed. Caulk with a bead of roofing cement over each nail head that is exposed, smoothing the bead with a putty knife to create a small domed bead to repel water rather than a flat surface where water puddles. Be sure to pay extra care at the seams where two tarpaulins join or where an existing flashing detail such as a chimney or vent pipe, meets the tarp it is these areas where most tarp failures begin, not the flat areas of the field.
Step 11: Check for Wrinkles or Loose Sections and Re-Tension as Needed
If safe, check around the entire perimeter of the tarp for any areas of sag, wrinkle or slight lift these are the first areas to fail in the event there is a wind. A taut tarp sheds both rain and wind far more effectively than one with slack, because slack material flutters, and fluttering fatigues both the tarp fabric and the nail holes around the battens until something gives. If you find a loose section, pull the batten’s nails partway out, re-tension the material by hand, and re-drive the nails rather than simply adding more fasteners next to the loose ones, which doesn’t fix the underlying slack. Pay close attention to areas around mid-span bracing boards on larger holes, since these are more prone to developing a slight bow if the board wasn’t fully seated during step eight.
Step 12: Do a Final Walkthrough From Inside the Attic With a Flashlight
As long as there is light out, go into the attic room below the tarped part, since a light beam will reveal daylight leaks much better on a dark attic than at night. Walk slowly under the tarpaulin looking for any pinpricks of light through, damp patches on the insulation or moisture forming on the underside of the decking itself. If the storm that caused the damage is still moving through the area, and light rain has started, run your hand along any rafters near the damage looking for any dampness that may be there but not visible yet, as you cover the fresh tarp with the tarp you can use to check for rain.
Common Mistakes That Undo a Tarp Job
The one most common problem that homeowners encounter when they want to tarp their roof during an emergency is the lack of nailing through the tarp material rather than through the battens. It might seem like it lasts longer while being attached, but once the wind blows on the poly sheeting, it will rip open along the bare nail hole, and the entire tarp will rip open within a day or two.
Undersizing the tarp is a close second. A tarp cut exactly to the size of the visible hole looks efficient on paper, but wind gets under any edge that isn’t well anchored past the damage, and once it lifts one corner the rest follows fast. Extending several feet beyond the visible damage on every side isn’t overkill it’s the margin that keeps the whole installation intact.
Skipping the underside inspection is the mistake that costs the most later. A tarp can look flawless from the ground while water is quietly tracking along a rafter and dripping somewhere else entirely, often above a wall cavity where it won’t show up as a ceiling stain for weeks.
Access and equipment on hand. Attempting emergency roof tarping, or how to put a tarp on a damaged roof more broadly, without a proper ladder, harness, or a second person on the ground to help position materials turns a manageable job into a genuinely risky one.
Answers to Common Questions About Tarping a Storm-Damaged Roof
Homeowners calling in after a storm tend to ask a similar handful of questions about emergency roof tarping before they commit to climbing up there themselves. For instance, one of the most frequent is simply how long a properly installed tarp is expected to last before it needs to be checked or replaced.
How long can a roof tarp stay up before it needs replacing?
A well-installed 10-mil or heavier tarp typically holds for two to four weeks under normal weather, though UV exposure and repeated wind loading degrade the material faster than a single storm event would. Check it after any major wind event regardless of how new it is.
How do I temporarily cover a damaged roof if climbing up there isn’t an option?
If it’s not safe to get on the roof, the honest answer to how to temporarily cover a damaged roof from the inside is limited: covering interior damage from the attic side with plastic sheeting and buckets to catch active drips is a stopgap until a licensed roofer can access the exterior. It won’t stop the leak, but it limits interior damage while you wait.
How to protect a roof from rain after a storm if the tarp keeps lifting in the wind?
Add mid-span battens across the tarp’s width, not just along the edges, and check that every batten is nailed into a rafter rather than just decking most lifting problems trace back to fasteners that never reached solid framing.
Does roof tarping after storm damage affect my insurance claim?
Tarping generally supports a claim rather than complicating it, since most policies expect homeowners to prevent further damage after a covered loss, but keep every receipt and photo since adjusters typically request that documentation.
Can I reuse a tarp for a second storm, or does it need to come down between repairs?
If you’re learning how to tarp a roof after storm damage, a tarp that’s still taut, free of new tears, and securely fastened can generally stay in place through multiple storm systems. The fastening points and seams usually fail before the poly material itself, so re-check those areas rather than automatically replacing the entire tarp.
Expert Advice for Homeowners Facing Storm Damage
The decision that matters most in any emergency roof tarping job isn’t which tarp to buy it’s an honest read of your own roof access and the weather window you’re working with. A well-fastened 10-mil tarp on a manageable slope, installed with battens and sealed seams, protects a home just as well whether a homeowner or a contractor puts it up. What actually causes repeat callbacks and worsening damage is rushing the fastening, undersizing the coverage, or climbing a roof that was never safe to walk in the first place. If any of those conditions apply to your situation, the safer and ultimately cheaper move is letting a crew with harnesses and ladders handle it the first time.
Expert Support for Your Project
Seattle Roof Systems handles emergency roof tarping calls throughout the wet season, from small wind-torn patches to full structural holes that need bracing before a permanent repair can even be scheduled. Their crews assess pitch, decking condition, and storm exposure on-site before recommending whether tarping alone is sufficient or whether the damage warrants a faster full repair.
Contact Seattle Roof Systems at (425) 996-1386 or email zoom@seattleroofsystems.com to discuss your specific needs. A same-storm-season response can be the difference between a contained repair and a much larger interior remediation job.
Sources
- National Weather Service Seattle Office — atmospheric river and storm tracking data.
- Insurance Information Institute — steps to take after a natural disaster.
- Federal Emergency Management Agency — disaster recovery and temporary repair guidance.