
A strong roof is one of the most crucial investments for your home. Asphalt shingles offer a balance of durability, affordability, and style, making them a top choice for residential roofing. Proper installation ensures that your roof will protect your home from the weather, extend its lifespan, and enhance curb appeal.
Following a step-by-step approach to asphalt shingle roofing installation services helps homeowners and professionals maintain high standards, avoid common mistakes, and achieve a long-lasting, attractive roof.
Step 1: Inspect and Prepare the Roof Deck
Before installing shingles, it is essential to inspect the roof deck carefully. A sturdy foundation guarantees that shingles will adhere properly and last for years. Any weaknesses or damages in the decking can compromise the roof’s structural integrity.
Preparation Steps:
- Inspect for rot, cracks, or water damage.
- Remove old shingles, nails, and debris.
- Repair weak spots or reinforce the deck.
- Ensure a flat and stable surface for installation.
Step 2: Install Underlayment
Underlayment acts as an extra protective layer between the roof deck and shingles. It shields the roof from moisture infiltration and provides added durability during severe weather.
Underlayment Tips:
- Use water-resistant or synthetic underlayment for maximum protection.
- Align sheets carefully to avoid gaps or overlaps.
- Fasten securely with nails or staples.
- Install flashing around chimneys, vents, and roof edges.
Step 3: Install Starter Shingles
Starter shingles form the foundation for the first row of shingles and protect the eaves from water damage. Installing them correctly is essential to prevent leaks at the roof edges.
Starter Shingle Tips:
- Begin installation at the bottom edge of the roof.
- Ensure proper overlap for waterproofing.
- Align straight to maintain visual appeal.
- Nail securely according to manufacturer instructions.
Step 4: Lay Field Shingles
Field shingles are the main covering of your roof. Proper alignment, spacing, and nailing ensure water resistance and a clean aesthetic.
Field Shingle Guidelines:
- Work row by row from bottom to top.
- Overlap shingles as instructed for proper coverage.
- Maintain consistent spacing for uniformity.
- Trim edges neatly for a professional look.
Step 5: Install Flashing
Flashing prevents water leaks around roof penetrations like chimneys, vents, and skylights. Correct installation of flashing is essential for a fully waterproof roof.
Flashing Steps:
- Place around all roof penetrations and valleys.
- Use corrosion-resistant materials for long-term performance.
- Secure flashing tightly to underlayment and shingles.
- Apply roofing cement to seal edges.
Step 6: Install Ridge Cap Shingles
Ridge cap shingles protect the highest points of the roof and provide a finished appearance. They also allow proper ventilation in some roofing systems.
Ridge Cap Tips:
- Begin at one end of the ridge and work along its length.
- Overlap each ridge cap for complete coverage.
- Nail securely to prevent wind damage.
- Ensure alignment for a uniform and polished finish.
Step 7: Inspect and Seal Roof Penetrations
Areas around vents, chimneys, and skylights are prone to leaks if not sealed properly. Applying sealant protects these vulnerable areas and ensures the roof remains watertight.
Sealing Tips:
- Apply roofing sealant around all penetrations.
- Check for gaps or misaligned shingles.
- Confirm that flashing remains secure.
- Test water resistance by observing after a light rain.
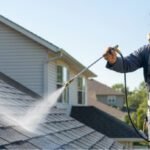
Step 8: Clean and Remove Debris
A clean roof prevents damage and allows for proper water drainage. Removing nails, leftover shingles, and debris ensures safety and enhances aesthetics.
Cleaning Tips:
- Sweep or blow off small particles.
- Remove loose nails and leftover shingles.
- Inspect gutters and downspouts for blockages.
- Dispose of old roofing materials responsibly.
Step 9: Perform Final Inspection
The final inspection confirms that all installation steps were completed correctly. It ensures the roof is functional, waterproof, and visually appealing.
Inspection Checklist:
- Verify shingle alignment and secure nailing.
- Check flashing and ridge caps for proper installation.
- Look for gaps, cracks, or exposed nails.
- Confirm underlayment coverage and overall roof integrity.
Step 10: Schedule Regular Maintenance
Routine maintenance extends the life of your asphalt shingle roof. Scheduled inspections and minor repairs prevent significant damage and costly replacements.
Maintenance Recommendations:
- Inspect annually and after severe weather.
- Replace damaged or missing shingles promptly.
- Clean gutters and downspouts regularly.
- Schedule professional inspections every few years.
Frequently Asked Questions
How long does asphalt shingle roofing installation take?
Usually 3–7 days depending on roof size, weather, and complexity.
Can I install asphalt shingles myself?
DIY is possible but hiring professionals ensures durability and proper alignment.
What are common installation problems?
Misaligned shingles, exposed nails, poor flashing, and inadequate ventilation.
How often should I inspect my asphalt shingle roof?
At least once a year and after storms.
Are asphalt shingles suitable for all climates?
Yes, they perform well in most climates with proper installation.
Conclusion: Ensure a Durable and Beautiful Asphalt Shingle Roof
A professionally installed asphalt shingle roof protects your home and enhances its curb appeal. Following this detailed step-by-step guide for asphalt shingle roofing installation services guarantees a long-lasting, weather-resistant roof.
Routine maintenance and careful inspections further extend the roof’s life, ensuring safety, durability, and visual appeal for years to come.
Schedule Your Asphalt Shingle Roofing Installation Services Today
Invest in professional asphalt shingle roofing installation services to secure a durable, long-lasting roof. Follow our step-by-step approach and enjoy a reliable, visually appealing roofing solution.